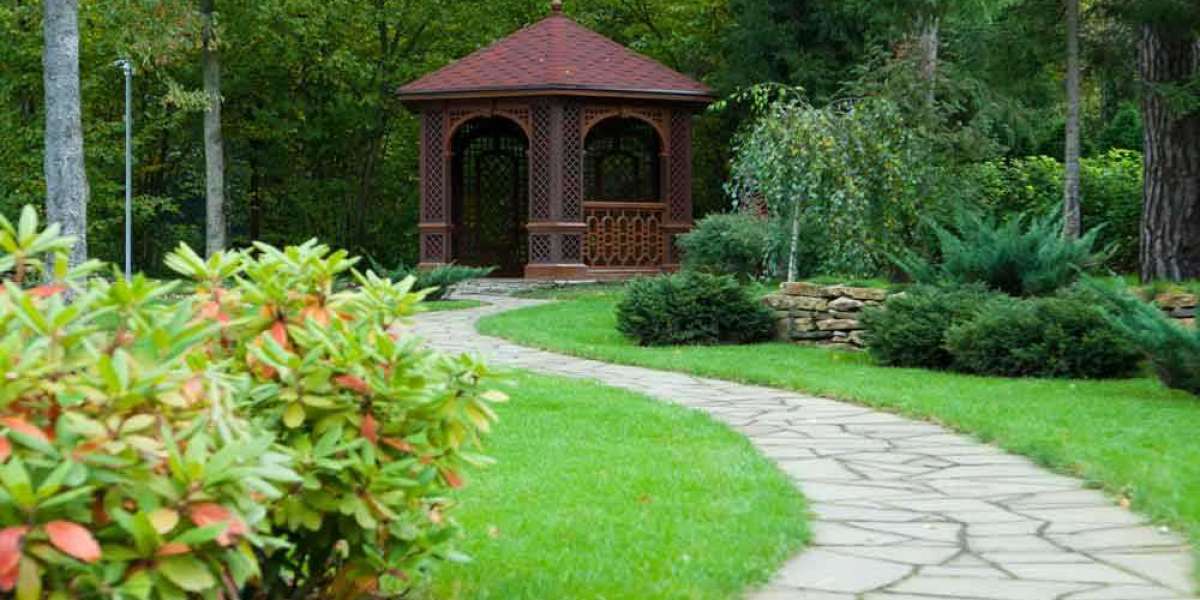
Making a perfect pathway through the garden would beautify its essence. Traversing through the garden over the mud, grass or just with an unplanned pathway, will never be a good choice. To make the core vision of the garden look its ultimate figure, one needs to spend a few bucks on the outdoor pathway tiles.
We can help you design a pathway for your beautiful garden, which would prove to be budget friendly too!
This method uses natural stones pavers tile and some amount of tiny pea pebbles, to construct a pathway in a very short duration of time. You are also given a choice to cut your paver stones and place it in the desired shape. As a whole, the entire method is to enhance the beauty of your garden, as well as the positive effects of nature itself.
Let us begin with the knowledge of the materials and tools required for the entire process.
Essential Instruments and Materials Required
» Preferred Paver stones or Step-stones
» Stone cutting machine (if required)
» Paver Base
» Paver Leveling sand
» Earth Rammer or Steel Tamper
» Pebbles of your Choice
» Hand Gloves
» Shovel
» Dead Blow Hammer
» Power Stone Cutter
» Measuring Tape
» Stakes and strings for measuring
» Push Broom
Now, here are the serial steps that you need to follow:
Step 1: To begin with, you need to be very sure about the project area, the type and the size of the area, on which you are set to work. Then using stakes and measuring tapes, mark about 5 to 6 inches of depth under the ground, including the total length of the Natural Stone Pavers. Clean all the grass and dig at least 5 inches deep so that you can easily fill up crusher gravels (paver base), level the sand and place the paver stones.
Again, using stakes make sure that the dug area is uniform from all the sides, even after digging. Mark out the finished course area and clear it using a shovel.
Step 2: When you finish excavating all the unwanted things around the dug area, lay down the required amount of Paver Base of your choice. As a suggestion, you could use the crusher run gravel and tamper it evenly on the entire dug area. Fill the pathway deep with at least 4-inch of the gravel or the paver base. At this point, you should make sure that you level the base all over, with the help of a good steel tamper. Settle the base, by spraying water through your garden hosepipe to spread all over and help the base hold its place.
While dealing with a large area, for leveling the paver base you can opt for the powered tamper or Earth Rammer. They can be easily hired from your nearest local hardware store.
Step 3: The next step is to lay the sand on the paver base. Once you are finished with the tampering of the base, move to the next step, i.e. spreading the sand. The selected sand should not accommodate any foreign materials or packed with larger sized stones. This will help you wind up your job easily. Start layering the sand over the paver base with the help of a shovel and tamper it patiently. You need to make sure that the paver base does not go upside-down the sand while you tamper the layering.
Step 4: The layering of sand is an essential step since the pavers have to be arranged over the sand. As an alternate process, you can make use of two pieces of ½” PVC pipes, which would assist in guiding the straight edges. You can lay the PVC approximately 4 feet apart and check for the perfect level of the layered sand. Use a wooden piece or a scrap solid to make it rest on the PVC pipes. Pull them back and let the scrap piece run on the top of the PVC. This will leave layered sand on the paver base with equivalent measure all over.
It is advisable that you layer the sand for about 1-inch above in order to cover the paver base efficiently. Tamp the sand and make it even more leveled and stable.
Step 5: Select the desired pattern of layering the paver stones. You can make use of the stakes and measuring tape to mark the pattern as per your choice. It is advisable to double-check the pattern and its measurement, before layering the stones.
Once when you are done, you can begin to place the pavers one after the other and press them using a dead blow hammer. Of course, you need to check the pattern and quantification periodically. After firmly hammering all the paver stones and layering them in the desired manner, you need to clean the area and upper part of the stones, free from sand. Use a push broom to sweep out all the sand from the pavers.
Step 6: If you have not opted for the process of cutting the stones, then you are done.
However, if you have decided to create a particular template pattern with curved borders using paver stones, then you need to add the process of cutting stones. Study all the edges, angles, shapes, and similar requirements, and then start cutting the stones with the help of a Power Cutter.
One thing you need to be prepared for is the time duration as the process is a little time consuming and about the mess that it is going to make. All you need is patience to complete the process. The resultant would obviously pleasing and worth your effort and time.
Step 7: As a final step, which is truly optional, is to make sure that the pathway constructed, does not get mix over in a long run. For this, you can opt for pouring light and quick concrete mix over the pathway. The mix should not show off the cement layer after drying. The mix should be watery so as to hold all the layers and paver stones in place. It will make the pathway stay flexible and confront any weather or ground movement, without easily getting cracked.
To sum up, you can add elegance and beauty by adding pea pebbles or some colored stones between the porcelain pavers.
Conclusion
The entire activity is convenient and can be executed with minimal effort. Apart from the above steps, there is no other requirement to plan extra or additional finance for the completion of this process. The expenses can be accommodated in your monthly budget. Therefore, having a pathway in your garden which you once considered a dream or a high-end activity, can come to reality with ease.
So, what is the need to wait and watch your neighbors, completing the task and take away the complements first? Have an ideal set up, gather the essential items and get steady to make your garden look appealing and pleasing.
Explore tilesbay.com for an unmatched selection of online tiles shop that combine style and functionality.


