In today's digital age, maintaining the security and privacy of our data is more crucial than ever. Mac users, known for their robust operating system and high level of security, might feel a false sense of security when it comes to delete sensitive files. Simply dragging items to the Trash and emptying it doesn't guarantee that the data is gone for good. Without proper measures, deleted files can be recovered, posing a risk to your privacy and security. This article explores effective ways to securely empty the Trash on a Mac, ensuring that your confidential information remains irretrievable. Whether you're dealing with personal documents, financial records, or any other sensitive data, these methods will help you securely empty Trash on Mac and safeguard your digital footprint.
How Do I Keep My MacBook Healthy?
Before diving into the specifics of securely emptying the Trash, it’s essential to understand how to maintain your MacBook's overall health. Regular maintenance not only prolongs the lifespan of your device but also ensures it runs efficiently and securely.
Regular Software Updates
Keeping your macOS and applications up-to-date is crucial for maintaining system health. Updates often include security patches, bug fixes, and performance improvements that protect your Mac from vulnerabilities and enhance its functionality.
Manage Storage Space
Managing storage space is vital for keeping your Mac running smoothly. Regularly review and delete unnecessary files, applications, and large attachments. Use tools like Macube Cleaner to identify and remove duplicate files, system junk, and other clutter that can slow down your system.
Backup Your Data
Regular backups are essential to protect your data from loss due to hardware failure, accidental deletion, or cyber-attacks. Use Time Machine, macOS’s built-in backup feature, or other cloud-based backup solutions to ensure your data is safe.
Monitor System Performance
Keep an eye on your Mac’s performance using Activity Monitor. This tool allows you to check the CPU, memory, disk, and network usage, helping you identify any processes that might be causing slowdowns or consuming excessive resources.
Maintain Physical Cleanliness
Physical cleanliness also plays a role in maintaining your MacBook's health. Regularly clean the keyboard, screen, and vents to prevent dust buildup, which can cause overheating and other issues.
Use Reliable Security Software
While macOS is known for its robust security features, using additional security software can provide an extra layer of protection. Consider installing antivirus and anti-malware programs to safeguard your Mac against threats.
Manage Startup Items
Too many startup items can slow down your Mac’s boot time. Review and manage the list of applications that launch at startup by going to System Preferences Users Groups Login Items. Disable any unnecessary items to speed up the startup process.
Optimize Battery Usage
For MacBook users, optimizing battery usage is crucial. Keep your battery healthy by avoiding extreme temperatures, calibrating it periodically, and using energy-saving settings. Monitoring battery health through the System Report can also provide insights into its condition.
Effective Ways to Securely Empty Trash on Mac
Way 1: Macube Cleaner
Now that we’ve covered how to keep your MacBook healthy, let’s delve into securely emptying the Trash. While the default method of emptying the Trash on macOS is straightforward, it doesn't ensure that the deleted files are permanently erased. Macube Cleaner offers a robust solution to this problem.
Overview of Macube Cleaner
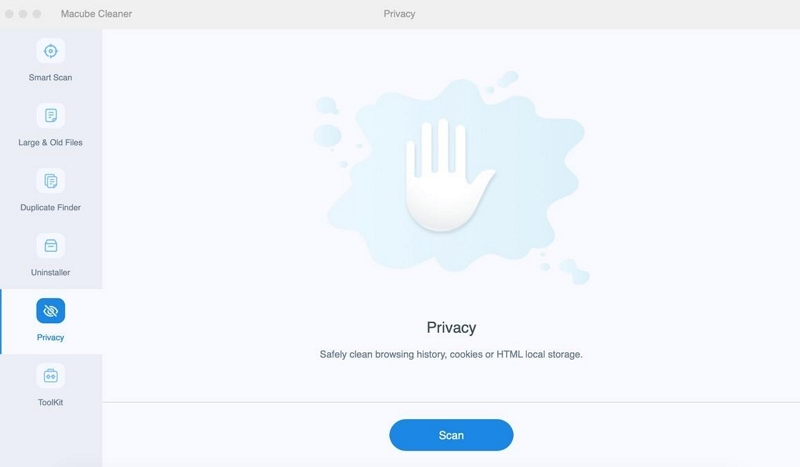
Macube Cleaner is an all-in-one utility designed to enhance your Mac's performance, manage storage, and secure your data. It features a user-friendly interface and provides several tools, including system junk cleanup, large file removal, duplicate finder, privacy protection, and secure file deletion.
How to Use
Here’s a detailed guide on how to use Macube Cleaner to securely empty the Trash on your Mac:
Step 1: Download Macube Cleaner
Begin by downloading Macube Cleaner, a specialized application aimed at eliminating superfluous files from your Mac. This tool is specifically engineered to identify and remove unnecessary files, helping you reclaim disk space and improve system performance.
Step 2: Execute a Smart Scan
After installing and opening Macube Cleaner, start a Smart Scan. This robust function thoroughly analyzes your Mac, identifying cache, temporary files, and other deletable data. Eliminating these files will enhance your Mac’s overall speed and efficiency.
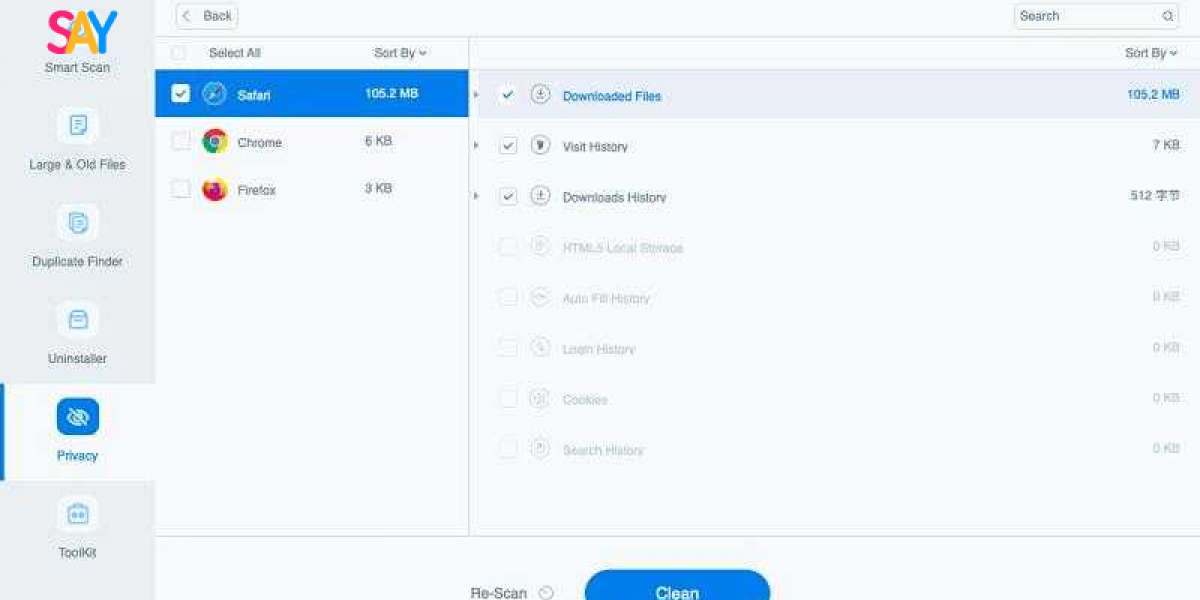
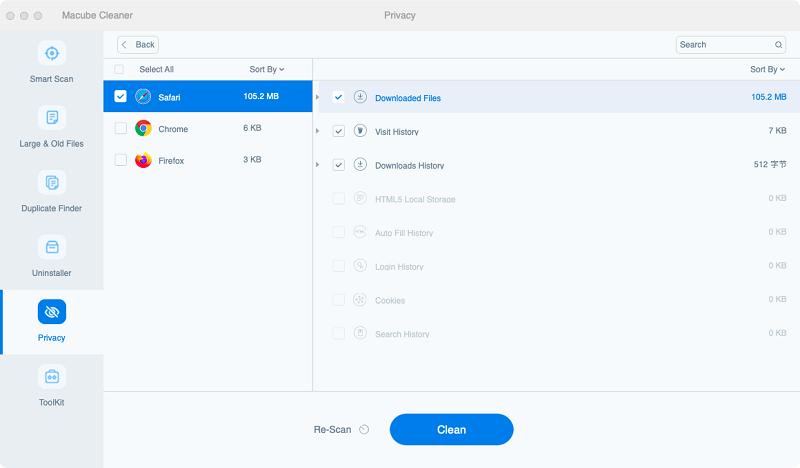
Step 3: Clearing Out the Trash
Once the scan is complete, head over to the Trash section in Macube Cleaner. This area will display all the items detected during the scan. To permanently delete these items, just click "Clean." If you prefer to remove only specific files, you can select those particular items before starting the cleaning process. This method helps keep your system free of clutter and enhances overall performance.
Pros and Cons
Pros:
- Improved Security: Ensures that deleted files are fully overwritten, making them impossible to recover.
- User-Friendly Design: Features an intuitive interface that is easy to navigate and use.
- Robust Toolset: Includes additional features for overall system optimization and maintenance.
- Efficient Performance: Quickly and effectively removes files, enhancing system performance.
- Privacy Safeguards: Goes beyond secure deletion by offering tools to clear browsing data and other sensitive information.
- System Optimization: Keeps your Mac in top condition by removing unnecessary files and efficiently managing storage.
cons
- Cost: Macube Cleaner is a paid utility, which may be a factor for some users.
Way 2. Using Terminal
When normal methods fail to delete certain files from the Trash on macOS, using the Terminal provides a powerful alternative. It allows you to securely and effectively empty the Trash, ensuring that all files are completely removed.
How To use:
Step 1: Open Terminal
- Launch Terminal: Open the Terminal application. You can find it in the Utilities folder within Applications or use Spotlight (Cmd + Space) to search for "Terminal" and open it.
Step 2: Navigate to the Trash Directory
- Access the Trash: Once Terminal is open, navigate to the Trash directory by typing cd ~/.Trash and pressing Enter.
Step 3: Remove All Items in the Trash
- Delete Files and Folders: To delete all items in the Trash, type rm -rf * and press Enter. This command deletes all files and folders in the Trash directory.
Step 4: Ensure Completion and Handle Errors
- Confirm Deletion: Ensure that all files are deleted without any errors. If there are issues, proceed to the next step.
Step 5: Administrative Access for Stubborn Files
- Use Sudo Command: If certain files cannot be deleted with the previous command, use sudo rm -rf ~/.Trash/* and press Enter.
- Provide Password: Enter your administrator password when prompted. This command ensures that all items, even those requiring higher permissions, are deleted.
Pros and Cons
Pros:
- Efficiency: Quickly clears the Trash without relying on the graphical interface.
- Effectiveness: Can delete files that Finder cannot remove, providing a thorough cleanup.
Cons:
- Risk of Data Loss: Files deleted through the Terminal cannot be recovered from the Trash, so caution is necessary.
- Caution Needed: Incorrect use of commands, especially those involving rm -rf, can accidentally delete important files.
Way 3. Finder Preferences to Manage Your Trash
Maintaining a tidy Mac and optimizing disk space are essential for ensuring smooth performance. One efficient method to manage your Trash is by using Finder Preferences, which offers an automated solution for emptying the Trash after 30 days. This approach helps keep your Trash clear without the need for manual intervention.
How to Use
Step 1: Access Finder Preferences
- Open Finder from your Dock or by clicking on your desktop.
- Navigate to the top menu bar, click on "Finder," and select "Preferences" from the dropdown menu.
Step 2: Enable Automatic Trash Removal
- In the Finder Preferences window, go to the "Advanced" tab.
- Check the box labeled "Remove items from the Trash after 30 days."
Pros and Cons
Pros:
- Automated Maintenance: Keeps your Trash clear without any manual effort.
- Space Optimization: Regularly deletes old files, helping to manage disk space efficiently.
- Ease of Use: Simple setup with no ongoing maintenance required.
Cons:
- Delayed Deletion: Files remain in the Trash for 30 days before being removed.
- Limited Control: Reduced ability to control the timing of individual item deletion since the process is automated.
Conclusion
In conclusion, ensuring the secure deletion of files on your Mac is essential for maintaining your privacy and safeguarding sensitive information. While simply emptying the Trash may not guarantee that deleted files are unrecoverable, employing more secure methods can provide peace of mind. Macube Cleaner offers a comprehensive solution, combining secure file deletion with system optimization tools, making it an excellent choice for users who want both security and enhanced performance. Its user-friendly interface and robust feature set ensure that your sensitive data is permanently erased while keeping your Mac running smoothly.
For those who prefer more direct control, using Terminal commands provides a powerful alternative for securely emptying the Trash. This method is particularly effective for dealing with stubborn files that Finder cannot delete, although it requires caution to avoid accidental data loss. Additionally, setting Finder Preferences to automatically empty the Trash after 30 days offers a hassle-free way to maintain a tidy and efficient system. By incorporating these methods, you can protect your digital footprint and ensure your Mac remains secure and optimized.


